Sunday, September 18, 2016

The Evolution of a Sand & Water Play Space

In March my husband and I were so excited to begin working on a sand & water table for O. We made our plans based on this sand & water table. I had a great time picking the colors, and it was exciting to put in the rock base for the water side of the table.


BUT then it rained all spring in Houston. And even though we created a cover for the sand side of the table and had drilled drain holes underneath, we just couldn't keep the sand dry - or get it dried out. By August I noticed that the wood under the sand was beginning to buckle and split. UGH! We loved our table, but it was time for a redesign.

I scoured Pinterest for new ideas and ways we could adapt the table we already had. I started finding ideas on creating a sensory path and an outdoor play space, and tried incorporating them with a sand table, but in the end, we decided to just make the whole space into an outdoor sand/water play space.

It was much easier than building another table and only took us a few hours.

We make out the space for the sand and dug down a couple of inches. then we laid out a weed barrier and placed rocks around the edges. (The rocks we took form a raised garden in another part of the yard.) Then we filled the sand area with play sand and the water area with river rocks. My hubby salvaged the pipe and shower head from the old table and mounted it to our fence post. (O's favorite activity is standing under the shower head anyway - even when it was mounted to the other table, he would contort his body to get under the water.)


My main concerns for putting the sand area in the ground are the cat that visits our yard and the ants. I read that mixing cinnamon into the sand will keep the ants out of it. So far it has worked - I have seen them passing across the sand, but not taking up residence. And the play space smells great! As for the cat, I just try to sift over the sand before Ollie starts playing.

In the future I hope to create a music wall on the dance behind the sand area.

Sunday, August 21, 2016

Play Date: Olympics


In an effort to socialize more and find a place to put my project energies, I decided to begin hosting monthly play dates for our local kids group. All of the kids in the play group are currently between 18-24ish months, so that is the target audience for the activities.


For our first play date, I decided to tag on to the 2016 Olympics and design an obstacle course and Olympic activities for the kids. After looking at many Pinterest examples of obstacle courses, I settled on creating something in doors (Texas heat and bugs). I am lucky enough to have a large open living area, so I enlisted my husband to build a couple of things and shift some furniture around.
Obstacle Course:
Hurdles - a pool noodle inserted on the cross bars of a couple of bar stools (but you could use dining room chairs)

Slalom - some cones set out (but you could use cups or plastic bottles)

Stepping stones - hubby made 4 "stones" by stacking pieces wood (cut to 8" x 8") to create different heights and screwing them together. He made 2 stones 1 piece high, 1 stone 2 pieces high, and 1 stone 3 pieces high. I stapled pieces of leftover "no-slip" rug padding on the bottom since we were using them on the wood floors.
Under or Over - a child size table placed in the pathway
Balance Beam - hubby cut down a 2x4 to a 4 ft length. He used the remaining pieces (2 1 ft lengths) to create feet for the beam by attaching them crossways underneath the beam. (Again I added rug padding to the bottom of the feet so it wouldn't slip around.) I placed it alone the back of our couch so the kids would hold on if they wanted to.

I also taped down a path for the kids to follow from obstacle to obstacle using blue painter's tape.

The kids did not run the whole obstacle course as a unit, but they did test out each element individually as they got comfortable with them. The balance beam was popular. The slalom cones did not stay put. I thought about taping them down, but decided the kids could play with them however they wanted.

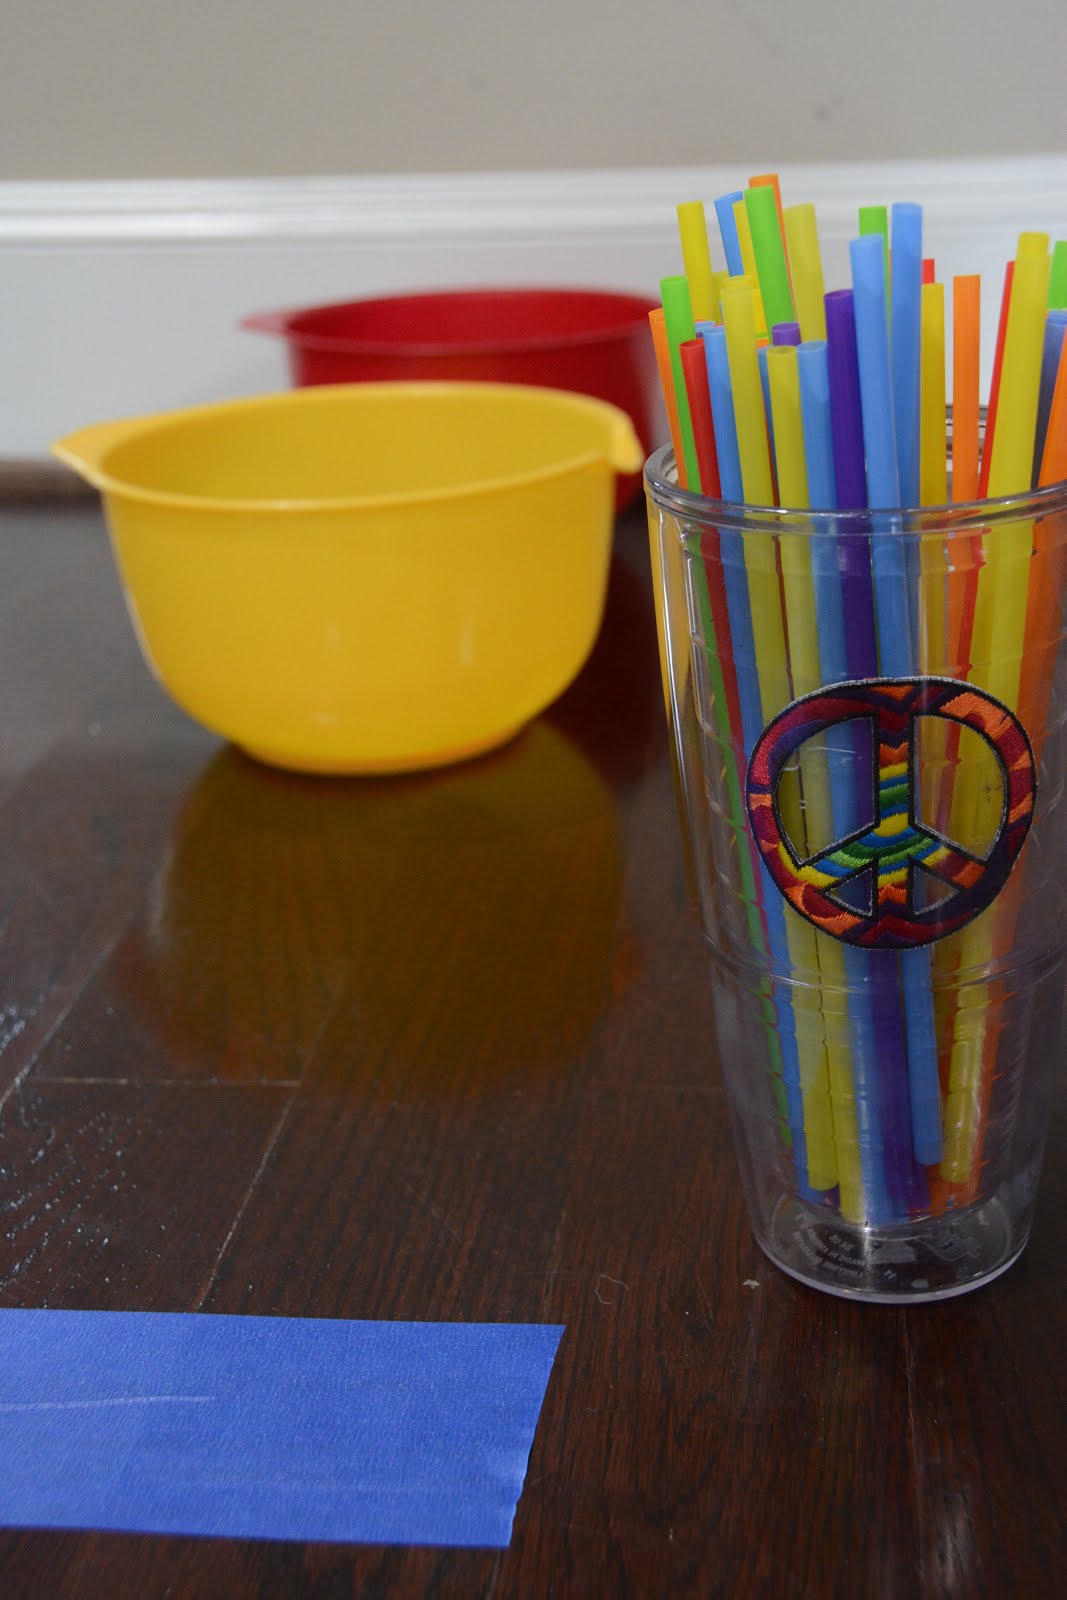
Straw Javeline Throw:
I got this idea from Toddler Approved. For our version, I put out a couple of large bowls and a cup with straws. Mostly the kids dumped and placed the straws, but they enjoyed playing with them. And they practiced fine motor skills when picking up the straws.


And being a recovering art teacher, I have to include an art activity...
Printing Olympic Rings:
The kids used toilet paper rolls to stamp circles in the colors of the Olympic rings. To try and keep the paint as clean as possible, I put each color in a separate cup of a foil muffin pan and put a single tube in each color.

Only a couple of kids chose to paint, but they had a great time moving the colors around the page.


For snacks, I had fruit in the colors of the Olympic rings as well as some locally made allergy free muffins.

And as a final touch, each child got to take home gold medal! They were easy to make. I got sticky back gold fun foam and some large ribbon. I cut 2 circles out for each medal and stuck them together back to back with the ends of the ribbon caught in the middle.


Sunday, December 7, 2014

Creating Christmas - Memento Ornaments

I knew I wanted to do something for the baby's first Christmas, and I still had the hospital cap and bracelet that he came home with. I didn't know what else I planned to do with them, and this was so simple. Of course I got the larger ornament to be able to get the cap inside, and used a pen to move things around until I liked it.


This is our 3rd Christmas in this house, but really the first one in which we have time to decorate. The first one, we moved in about 3 days before Christmas, The second one we were visiting family in Australia and arrived home on Christmas Eve. Again, I found this idea on Pinterest and loved the simplicity - and bonus, I already had the materials!


Tuesday, December 2, 2014

Creating Christmas - Glass Globes & Sprinkles

Okay, we have all seen glass globe ornaments decorated in a bazillion ways - years ago I did a nativity scene on a glass globe by filling with paint for the background and painting details on the outside. When I found this on Pinterest though, I loved the idea to use sprinkles.


But I was skeptical of the outcome. My initial fears:
- clumping glue and thus clumping sprinkles
- dissolving sugar resulting in bleeding, runny colors


I am happy to say neither of these fears was realized. I think what really made it work was using acrylic varnish as the glue. I wasn't sure I had any so Modge Podge was going to be my back-up. I didnt have to use it though, so I am not sure how well it would work. The varnish is much thinner than white glue or Modge Podge, so it created only the thinest layer inside the globe. It also begins to dry quickly, so less chance of bleeding colors.

Since I was already doing peppermints, I stuck with the red and white idea. I tried plain red sugar crystals and a mix of red and clear. 


The plain red crystals were finer so they created a more complete coat of color on the inside of the globe, creating a textured but uniform look - almost like velvet. I love how the mixed crystals turned out. The crystals were larger, so the missed some spaces, but you can really see the texture and when light shines through they almost look like stained glass. 

Using the little bar or ball sprinkles would give you even more variety!

Saturday, November 22, 2014

Creating Christmas - Peppermint Ornaments

Last year I told my hubby that our small apartment tree was not going to cut it in the new house, so this year I am going from a 6 foot tree to a 9 foot tree. Of course that means I need more decorations and ornaments, but instead of spending a lot on decor that is only up part of the year, I scoured Pinterest for ideas on ornaments I can make.

I fell in love with these peppermint candy ornaments from HelloHomebody and thought how hard can it be?

I had 6 cookie cutters in 3 sizes. In the largest I used 9 peppermints, in the medium I used 3 peppermints, and in the smallest I used 1 peppermint.


It wasn't that hard, but here is what the simple four-step procedure gorgeously depicted on Pinterest doesn't show you:

- Spraying cooking spray on the inside of a cookie cutter is messy and hard to do without a lot of over spray. I sprayed in short bursts and then used a paper towel to help get the spray into the corners of my stars.

- Cookie cutters are not flat against the cookie sheet. I noticed this when I first put them on the cookie sheet, but took a chance to see what would happen. Yes, some of the peppermint candy oozed out underneath the cookie cutter, but I found that I could score it with a toothpick while it was still warm and it would easily break off later. And even the scoring is not always necessary.


- If the candy cooks a bit too long, it will start to bubble up, but as long as it isn't burnt, it still makes a cool ornament. On a couple of batches, the candy was in the oven for a minute or so too long and created a more swirled design.

Out of my 3 batches, I lost about 3 stars which broke completely (too thin?) and I have a couple of stars that points broke off, but I am going to try to repair with glue or modge podge. Since I don't plan to eat mine, I am going to coat them with modge podge or acrylic medium so they aren't so sticky to touch.

The debris pile - mostly from candy that oozed under the cookie cutters and had to be broken off.
I plan to try to reuse it to create some more ornaments.

Creating Time For Myself

I finished the canvases and nursery projects just in time for the little one's arrival.


So now that he is here, where do I find time to create? At first I didn't. I was doing all I could just to eat, sleep and feed the baby. But then my wonderful friend (and "sister") Shannon sent me a birthday present. She gifted me a class at Craftsy. I had never heard of this site before, but it is pretty good. You can take online classes for a collection of different "crafts" from woodworking and gardening to drawing and painting. I chose a couple of classes in drawing / mixed media. Once I bought them, they still just sat in my account for a while, but slowly I have been able to start working through the lessons. Each class is about 7 lessons and each lesson is about 20 minutes, which works right now because I can watch in segments. Then there are "assignments" or projects designed for you to practice your new skills.

Another site where I have found great online classes for creatives is Creative Live. Creative Live has many classes ranging from photography and video skills to lifestyle and business improvement all designed for the creative minded. They have a calendar of classes that stream live for free, and you can buy classes from their collection to watch anytime at your leisure.

What about you? Do you know of other creative online classes? Where do you turn for classes online?

Thursday, August 28, 2014

Mobile - A Sky Full of Stars


As I was browsing Pinterest back in the Spring for nursery ideas, I came across a pin of a mobile made from a bicycle wheel and paper airplanes. I loved the idea. But where to get a bicycle wheel? I finally found one I liked through eBay - and the 20" size was perfect for a mobile.


Then I put my engineer husband to the task of figuring out the best way to hang it. This is where the power of the Weatherwaxes come into play - "Weatherwaxes create!" (Makes me think of "Thundercats roar!" - hopefully some of you know what I am talking about.) My darling hubby, his mad CAD skills, and his CNC milling machine created a beautiful connector / bracket that pinned into the wheel and then into the wire cable. He even made sure that he could fit a wrench into the connector to tighten down the nuts. (Not sure I would have thought about that in the design process. I would have been more concerned about the aesthetics. We have lots more creative projects brainstormed, and I can't wait to share them - but they are Christmas presents so.... Turns out we make a pretty good creative production team.)


I thought the paper airplanes looked cool, but I wasn't sure if that's what I wanted to hang from the mobile. So with more browsing, I came across all kinds of origami and folded paper ideas. Then Coldplay came out with their new album Ghost Stories, and I saw the Target commercial with "A Sky Full of Stars," and decided I wanted to use stars, but I wanted them three dimensional and all of the origami versions I found were flat. That's when I turned to using papier-mâché forms and decoupage. 


My original idea was to use sheet music, and after much back and forth and consideration of other papers (leftovers form the Alphabet series, book pages, etc.) I stuck with the sheet music. I found a cheap-ish book of Jazz sheet music at the local Half Price Books and started tearing it up. I used the same PVA glue from the Alphabet series to collage the pieces of sheet music onto the stars and the sphere. The final decision was whether or not to add any color to the stars and moon, but they look so great just the way they are that I decided to leave them black and white.