Wednesday, November 28, 2018

Discovery Bottles

This fall T and I did a baby sign language class (hosted at my house) with an awesome group of moms and babies. One day as the babies were chillin' I had out the discovery bottles I made when O was little. The babies LOVED them, and so did the moms. With their encouragement, I set up a make and take for some discovery bottles, and everyone had a blast.


We made 4 different bottles:

- Winter: sparkle pompoms (in winter colors), mini pine cones (potpourri), jingle bells (various sizes)

- Ocean: 3-5 undersea creatures, 5 shells. Fill bottle with blue colored water. 
Options: glitter, mineral oil (visual wave action), drop of dish soap (breaks up the oil and adds some suds)

- Magnetic: color chips, colored paperclips, washers (various sizes). Fill bottle with mineral oil. Using a magnetic, children can move the items around in the bottle. But even without a magnet, the bottle is pretty.

- I-spy: 8-11 small items. Any small items can be used. We used lacing letters (to spell out child's name), small animal counters, small vehicle counters, small porcupine balls, marbles, feathers, crayons, dice, etc. Fill the bottle with colored rice. You want enough to cover the objects, but still enough room for things to shift around. 
Option: Use printable shrink film to print a picture of your child, cut, shrink and add to the bottle (Pay attention to the shrink directions for how to size the picture. Also it will darken as it shrinks, so print it lighter than you usually would.) 
Option 2: As you gather items, lay them out on a white sheet of paper. Take a picture of them before adding them to the bottle. Use the photo to make a key card of all the things to search for in the bottle.

Be sure to seal the lids of the bottles with hot glue or superglue if you don't want to run the risk of a clever toddler opening them.

Here are the bottles I use. (Yes, I could save bottles, but I like these because the opening is big enough to get items inside and the sides are flat so the objects can be seen. Also I am anal and want all the bottles to be the same.)

Colored Rice:
1 c rice
1 tbsp vinegar
20-40 drops food color (20 drops for intense colors/gel food coloring, 40 drops for lighter colors/regular food coloring)

Put all ingredients in a sealable container (I used gallon sized storage bags).
Seal and shake until well combined.
Leave in container to finish absorbing and drying (the rice will continue to absorb the color as it dries).

Wednesday, November 14, 2018

Happy Thanksgiving


My latest projects include disguising a turkey and creating centerpieces for the preschool Thanksgiving lunch. O helped with both.


Space Turkey - why not?

Thursday, November 1, 2018

Halloween: A LIGHT-UP ROBOT!

Well, its been almost a year since I posted - a new kid makes creative time hard to come by. But of course when O requested a robot costume for Halloween, I had to make it happen. After looking at lots of examples on Pinterest, I decided O would not want to wear a box all night, so I went for something made of cloth. I found this one particularly cute, so I adapted it for O.

As the son of an electrical engineer, it had to light up. It also had to have an oscilloscope and on/off buttons. I used Wunder Under to attach the felt pieces to each other and the costume base. I added cardboard inside the costume in a couple of places to give it some rigidity. And I attached El-wire to light it up.  We just happen to find a hat with a circuitry design and LED lights at our favorite box store (starts with a T).

O was sooo excited! He couldn't wait to show off his robot moves.

I couldn't leave little brother out, so he got a robot costume too.


Thursday, November 9, 2017

Toddler STEAM: Kaleidoscope

O-man and I haven’t done a specific art project in a while, but I have been pinning a ton of STEM/STEAM things for my SIL who teaches elementary school. This afternoon we had extra time before dinner, so I scrolled all those pins and found a quick fun project that we miraculously had all of the materials for. Literally I gathered the materials in about 1 minute, and the project was done in 15 minutes - O-man doesn't usually complete projects that last longer than that.

You can find the official instructions here: https://buggyandbuddy.com/science-for-kids-how-to-make-a-kaleidoscope/

I am all about making projects easily accessible and done, so the fewer special materials needed, the better. We made a couple of modifications, but the results were still successful enough for my 3 year old.


Our Materials:

-toilet paper roll
-cardstock
-straw
-aluminum foil
-scissors
-tape
-circular object about 3.75" in diameter (to trace circles)
-crayons/markers (for decorating)


Our Modifications:

- We didn’t bother painting the toilet paper roll. I let O-man color on it while I traced and cut out the circles.

- Speaking of circles, I didn’t take the time to print the template - the canister of raisins was close enough in size that I just traced the bottom of it a couple of times on a piece of card stock.

- O-man marked on the circles, and I added a bit of variety for better viewing results. (He did this step as I was working on the aluminum foil.)

- We didn’t have Mylar sheets, but we did have aluminum foil. I just tore a big piece and folded it over a couple of times, with the shiny side out, to make it thicker. You could cut it to size at that point, but again, I didn’t bother. I just tri-folded it into a prism and taped a couple of times. You do want it to fit snuggly in the toilet paper roll - I had to refold a couple of times. It was too long, so I just cut it to size and reshaped it a bit.

- The last steps were just assembly - tape straw on top, put prism on the inside, poke hole in center of circles (I just used scissors), and ta-da! O-man kept tipping the kaleidoscope, making the prism fall out, so I lightly taped the end in a couple of places to help hold it in.

- The circles are easy enough for O-man to spin and switch on his own - BONUS!

Tuesday, June 27, 2017

Ice Painting


This was completely a time-filler last-minute art activity. Last week we were busy doing art and STEM projects at a local class that we almost didn't have one at home. But one afternoon it was hot, and O didn't take a nap, and I needed something for him to do.

MATERIALS:
- ice (cubes, chunks, whatever - the bigger they are the longer they will stay before melting)
- pan watercolor paints
- paint brushes
- small cup of water for washing brush
- tray, baking sheet, plate, etc. to hold ice


INSTRUCTIONS:
- Put ice on tray
- Paint!

I have seen similar ideas on Pinterest, but I just poured a bunch of our ice on a baking sheet, pulled out the pan water colors and took everything outside. DONE! In our case, O had more fun playing with the ice than painting, but he did put a bit of color on it too.


ALTERNATIVES:
For a creative sparker project or something that ends up on paper, you could use the same idea of ice and paint but follow these instructions:
- Line a tray/baking sheet with watercolor paper
- Put a few pieces of ice on top of the paper
- Add color on top of the ice
- You can leave it to melt for a completely nature/science created piece or you can play with the ice on the paper letting it melt as you go.
- Sprinkle on some large grain salt (rock salt, kosher salt, etc.) while the paper is still wet for a completely different effect. This works best on top of more intense or darker colors.

I also did something similar with O when he was younger, but we used food coloring and ice on his highchair tray. (Totally food safe!) I put a couple of ice cubes, about a teaspoon of water and a drop of food coloring on the tray and let him move it around with his fingers. When he was finished playing, I pressed a piece of watercolor paper on top to preserve his "art."

Tuesday, June 20, 2017

Salad Spinner Painitng


Another quick and not-so-dirty art project using one of O-man's favorite toys - the SALAD SPINNER! He likes to fill it with cars, spin it, and listen to them rattle around.

This is a good project to experiment with color mixing, and the final product is a great jumping off point for many other projects.

The best thing about this is that the mess is contained WITHIN the salad spinner. YES!

MATERIALS:
-Salad spinner
-Coffee filters (or any paper that will fit in your salad spinner)
-Paint (We used liquid watercolors again.)
-Table covering (for drying area)
-Arm muscles!


INSTRUCTIONS:
Place a coffee filter in the basket of the salad spinner.


Add drops/squirts of paint on top. We used 2-4 colors. The liquid watercolors soak into the coffee filter pretty quickly, so you want to drop them in and start spinning. The more paint you add, the more liquid, the longer it takes to soak in, the more it will spin out - you get the idea.


And SPIN! With my little guy, I would often give it a good first spin to get the paint moving and then let him spin it as long as he wanted to.

Open it up and see your creation.


For this project, you definitely want a protected place for the coffee filters to dry since the paint will soak completely through. We put newspaper down on the dining table for a drying area.


ALTERNATIVES:
I love the vibrancy of the liquid watercolors for this project. But you could use tempera or other paints - just make sure they are thinned out enough to move with the centrifugal force of the salad spinner. You can also use typing paper or card stock cut down to fit in the salad spinner (circles or squares).  With thicker paint and thicker paper, you might see more of the spinner effect because the paint will sit up on top of the paper. You could also try adding glitter glue if you are into sparkles.

AFTER CREATION:
Again this is simple a beautiful process art project, but if you want to do something with it:
-use it for collage or art journaling
-scrunch it in the middle and use pipe cleaners or a clothes pin to create a butterfly and/or a flower
-add a few cotton balls in the middle, fold over and tie it with string (ghost style). Let your little one practice cutting the edges of the coffee filter into strips (from the edge to the string) to create a jellyfish or an octopus.
-cover with contact paper or laminate sheet, punch hole and hang it in the window as a sun catcher.

Tuesday, June 13, 2017

Bubble Painting


It has been a while since I posted anything - keeping up with a two year old is exhausting!

Anyway, hopefully I will get to post some new work of my own soon, but in the mean time I am going to do a series on quick, easy, not-so messy art projects to do with kids - but adults will have fun too, and it just might spark your creativity.

And since I have said two year old, keep in mind that sometimes the set-up takes longer than the project since I am working with a 10-15 minute attention span.

I had seen some pins and blog entries on bubble painting a while back and wanted to give it a try. I figured O-man would enjoy the bubbles even if the art didn't work. And he did. HOWEVER, even though O-man drinks from straws all the time, he couldn't quite figure out the coordination to blow out on the straw and breathe in WITHOUT sucking up soapy paint water. (Yep, a couple of sputtering tries later, I took over the blowing of the bubbles.)

This one CAN get a bit messy - the bubbles are holding paint, so wherever the bubbles go, so does your paint. But, since there is soap mixed into the paint, the clean-up isn't too bad.

So here is the project:

MATERIALS:
-Paint (We used liquid watercolors since that is what I had. Finger paint didn't work very well - I think because it was too heavy to get picked up by the bubbles.)
-Dish soap
-Bowls (One for each color you want to use. Plastic disposable bowls work great. I didn't have any, so I used some glass ones from the cabinet.)
-Straws
-Paper (We used card stock - it is a bit thicker so it is stiffer and hold up to toddler hands and water.)
-Table covering (Optional)

INSTRUCTIONS:
In each bowl, fill about half full of water and add a few drops of paint. The more paint you add, the darker your colors will be. It also depends on what kind of paint you are using.


Add a couple of drops of dish soap to each bowl and stir to mix.

Now comes the FUN! Use a straw to blow bubbles into each bowl of water. The bubbles last a while, so no need to rush. In fact, we lined up our four bowls down the center of the table, blew into each one and then moved on to the next step.


Gently lay your paper on top of the bubbles. You can turn and roll your paper to collect more bubbles. As the bubbles pop and dry, they will leave a print on the paper. You can layer colors to create different patterns and cover the whole paper.


As the bubbles disappear, use the straw to blow more bubbles, and repeat.

AFTER CREATION:
So of course, this can just be a fun experiment for exploring a new way to create art. It is also a great way to create a background for a future drawing or painting, start a journal page, create collage paper, or anything else you can think of.


Monday, October 17, 2016

Halloween Sensory Play - Witches' Brew

I had a great Halloween play date planned, but had to cancel at the last minute because my household got sick. Now I have a bunch of activities to try out with O.

O LOVES playing in water and bubbles, so when I saw the idea for a Witches' Brew water sensory activity, I thought it was perfect.

I had some ideas of the types of things I wanted to put in the brew, but I also wanted to keep it cheap. I happened to find some great $1 toys - eye ball bounced balls, sticky skeletons, sticky bugs, plastic spiders, spikes balls, etc. I added a bit of dish soap to the water to create bubbles and used food coloring to make it green. O had a great time (about 30 minutes! YAY!) independently playing with the brew. I gave him and extra bowl, a slotted spoon, a ladle, a measuring cup and some tongs to pick things out, stir and transfer.

We set up with a couple of bowls on the living room floor on top of a towel. You could also use the same idea in the bath tub or sans water just for touching.

Tuesday, October 11, 2016

Decorating Pumpkins Toddler Style


Way back in September I had the thought to let O decorate a pumpkin with stickers - easy, no mess. Then I found these great felt stickers in the $1 aisle at Target and just couldn't resist. O had a great time sticking all of the eye balls on his pumpkin and is very proud of his creations. We are using them as part of our table center piece and he likes to see them and talks about them all the time.

Sunday, October 9, 2016

Fall Decorating

This year I wanted to keep decorations simple, but I LOVE fall...even though it takes forever to get to Houston. I really love decorations that can last through more than one holiday, too.

I found this great idea for color wrapping wheat stalks. It was so easy to do, you can use any colors you want and is a simple/elegant/casual Fall decoration that can last from September through Thanksgiving. (I did mine while binge watching Outlander.)

I had wanted to try my hand at some melted crayon art and saw an idea for melting crayons over the top of pumpkins (somewhere). SO COOL! It was pretty easy, but it took a little while for the crayons to heat up enough to melt, and I had to keep the hair dryer on a low enough speed that it didn't blow the crayon bits off.


Melted Crayon Pumpkins

Materials:
pumpkins
crayons
hair dryer
newspaper/parchment paper
glue (optional)

I started by washing off my pumpkins. I placed the pumpkins on a cookie sheet that I use for crafts, but you could use newspaper or parchment paper. Then I had O help me choose colors, and I broke small pieces off of the crayons and placed them around the top of the pumpkins. For my little pumpkins I only needed about 3 small pieces for each one. (If you want to use glue to hold the crayons in place as they begin to melt, just glue them in place and let the glue dry before proceeding.)

Then I held the hair dyer over the top to heat up the crayons. It might take a couple of tries to get the best setting, depending on your hair dryer. A setting that is hot, but not powerful works best. Once I saw that the wax was melting, I tipped the pumpkins in different directions to get it to drip over the sides.

Let them cool. And you're done!

Sunday, October 2, 2016

Play Date: Construction

For September, I decided to do a construction themed play date - partly because my kid LOVES everything digger and construction, partly because I did a construction theme for his birthday and I could re-use some of the stuff.

Activities:

Sand & Digging
I was originally planning to have the kids play outside in our sand play area, but the weather didn't cooperate, so we were inside...with SAND! To keep things under control, I decided to try making kinetic sand.

Here is the recipe I used:
Kinetic Sand
5 c. play sand (you can get it at a local big box hardware store or from your sand box)
3 c. flour
1 c. oil (I used vegetable oil and I added another 1/4 cup)

For my purposes I made 2 of these recipes, put it in an old photo developing tray and mixed it up. When everything was mixed, I added some diggers and trucks, a couple of plastic spoons and forks, and a couple of plastic scoops. I also grabbed some rocks from outside and put them in bowls next to the sand.

Painting with Trucks
I put a few different colors of paint on a cookie sheet lined with foil and got a package of 5 small CAT construction machines at a local store. The kids rolled the construction vehicles in the paint and then on their papers.


Truck Wash
I put a few inches of water in a plastic bin and added a little bit of dish soap. The kids had (new) toothbrushes they could use to scrub their trucks. They love playing in water and bubbles, and this was a great way to wash hands and trucks after sand and paint. Of course a couple of kids attempted to brush their teeth!

Hammering Golf Tees
I got florist foam from a big craft store (cheaper than the styrofoam in the art section) and a package of golf tees. We already had a couple of plastic hammers for the kids to use. I started the foam blocks by lightly pushing some tees in. The kids mostly just pushed tees into the foam rather than hammering, but they really enjoyed doing so. And then they pulled them out and did it all again!

I also put out our other toys related to construction -
-trucks and diggers
-blocks (plastic Mega blocks and wooden building blocks)
-plastic tool box and workbench

Sunday, September 18, 2016

The Evolution of a Sand & Water Play Space

In March my husband and I were so excited to begin working on a sand & water table for O. We made our plans based on this sand & water table. I had a great time picking the colors, and it was exciting to put in the rock base for the water side of the table.


BUT then it rained all spring in Houston. And even though we created a cover for the sand side of the table and had drilled drain holes underneath, we just couldn't keep the sand dry - or get it dried out. By August I noticed that the wood under the sand was beginning to buckle and split. UGH! We loved our table, but it was time for a redesign.

I scoured Pinterest for new ideas and ways we could adapt the table we already had. I started finding ideas on creating a sensory path and an outdoor play space, and tried incorporating them with a sand table, but in the end, we decided to just make the whole space into an outdoor sand/water play space.

It was much easier than building another table and only took us a few hours.

We make out the space for the sand and dug down a couple of inches. then we laid out a weed barrier and placed rocks around the edges. (The rocks we took form a raised garden in another part of the yard.) Then we filled the sand area with play sand and the water area with river rocks. My hubby salvaged the pipe and shower head from the old table and mounted it to our fence post. (O's favorite activity is standing under the shower head anyway - even when it was mounted to the other table, he would contort his body to get under the water.)


My main concerns for putting the sand area in the ground are the cat that visits our yard and the ants. I read that mixing cinnamon into the sand will keep the ants out of it. So far it has worked - I have seen them passing across the sand, but not taking up residence. And the play space smells great! As for the cat, I just try to sift over the sand before Ollie starts playing.

In the future I hope to create a music wall on the dance behind the sand area.

Sunday, August 21, 2016

Play Date: Olympics


In an effort to socialize more and find a place to put my project energies, I decided to begin hosting monthly play dates for our local kids group. All of the kids in the play group are currently between 18-24ish months, so that is the target audience for the activities.


For our first play date, I decided to tag on to the 2016 Olympics and design an obstacle course and Olympic activities for the kids. After looking at many Pinterest examples of obstacle courses, I settled on creating something in doors (Texas heat and bugs). I am lucky enough to have a large open living area, so I enlisted my husband to build a couple of things and shift some furniture around.
Obstacle Course:
Hurdles - a pool noodle inserted on the cross bars of a couple of bar stools (but you could use dining room chairs)

Slalom - some cones set out (but you could use cups or plastic bottles)

Stepping stones - hubby made 4 "stones" by stacking pieces wood (cut to 8" x 8") to create different heights and screwing them together. He made 2 stones 1 piece high, 1 stone 2 pieces high, and 1 stone 3 pieces high. I stapled pieces of leftover "no-slip" rug padding on the bottom since we were using them on the wood floors.
Under or Over - a child size table placed in the pathway
Balance Beam - hubby cut down a 2x4 to a 4 ft length. He used the remaining pieces (2 1 ft lengths) to create feet for the beam by attaching them crossways underneath the beam. (Again I added rug padding to the bottom of the feet so it wouldn't slip around.) I placed it alone the back of our couch so the kids would hold on if they wanted to.

I also taped down a path for the kids to follow from obstacle to obstacle using blue painter's tape.

The kids did not run the whole obstacle course as a unit, but they did test out each element individually as they got comfortable with them. The balance beam was popular. The slalom cones did not stay put. I thought about taping them down, but decided the kids could play with them however they wanted.

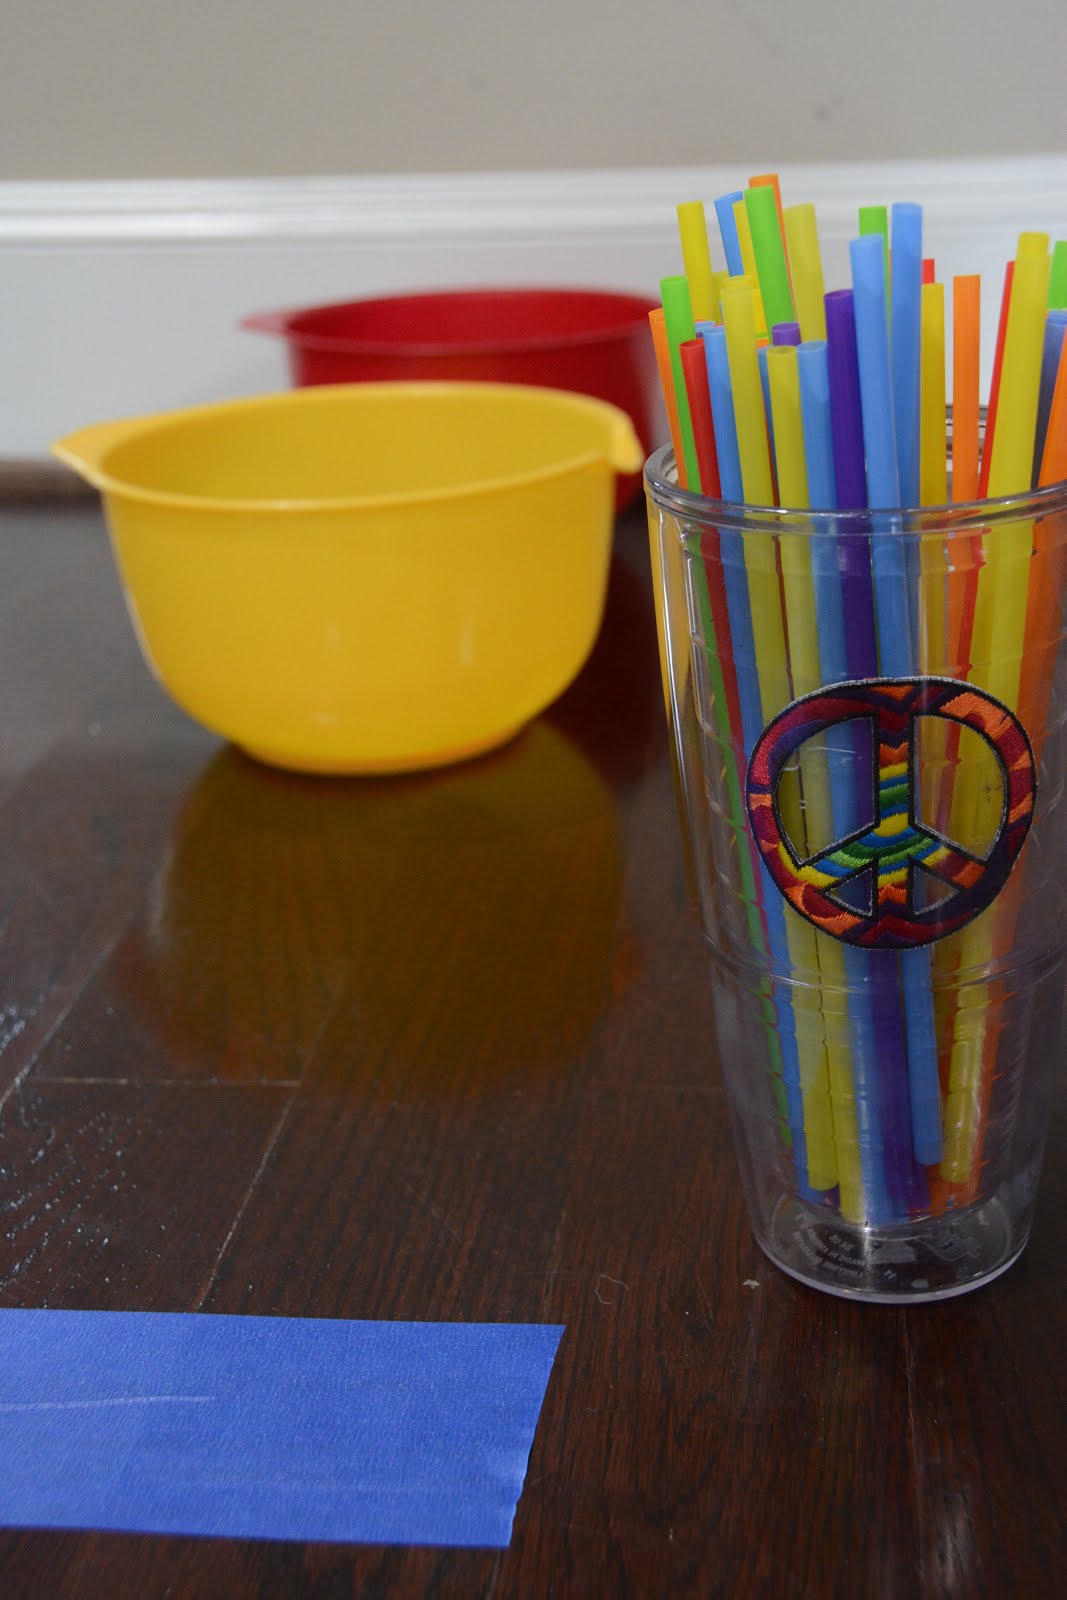
Straw Javeline Throw:
I got this idea from Toddler Approved. For our version, I put out a couple of large bowls and a cup with straws. Mostly the kids dumped and placed the straws, but they enjoyed playing with them. And they practiced fine motor skills when picking up the straws.


And being a recovering art teacher, I have to include an art activity...
Printing Olympic Rings:
The kids used toilet paper rolls to stamp circles in the colors of the Olympic rings. To try and keep the paint as clean as possible, I put each color in a separate cup of a foil muffin pan and put a single tube in each color.

Only a couple of kids chose to paint, but they had a great time moving the colors around the page.


For snacks, I had fruit in the colors of the Olympic rings as well as some locally made allergy free muffins.

And as a final touch, each child got to take home gold medal! They were easy to make. I got sticky back gold fun foam and some large ribbon. I cut 2 circles out for each medal and stuck them together back to back with the ends of the ribbon caught in the middle.